So I was recently intrigued by Raspberry Pi Zero W, it’s small ARM-based Linux PC with integrated WiFi and ability to connect shields (known as Hats or pHats in Raspberry lingo) , got me thinking what kinds of interesting applications could I use it for. After coming across the Scroll Phat HD in my electronics store, it hit, me how about a small animated stock ticker, that gets near real time stock quotes, like those on classic displays. This post will outline the steps you need to take to make this project. You should be comfortable with Linux command line and be patient when dealing with the hardware. This is very hands on project, but it’s fun and fairly easy to complete.
[poll id=”2″]
A little background on Raspberry Pi …
For those that are unfamiliar Raspberry Pi it’s a family of ” small affordable computers that you can us to learn programming” produced by the Raspberyr Pi Foundation. The Raspberry Pi , which comes in different form factors and editions is an ARM based Linux low powered computer, that can provide basic computing platform for a variety of educational and hobbyist communities.
The foundation originally intended to promote computer science and technology for underserved youth, by providing very low cost hardware entry to the computing world. In addition to the foundations original goal, it has also gained a loyal following in the hobbyist and maker communities, where there low cost but fully capable Linux PC lends itself to all sorts of projects.
Teh rasperry Pi family now has Raspberry Pi , Raspberry Pi 2, Raspberry Pi 3 and the one we’ll be using the Raspberry Pi Zero W ( the W is important as it denotes built in Wireless capabilities)
Hardware: Bill of Materials
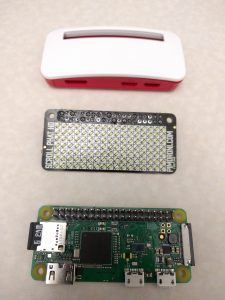
Here’s a list of things you’ll need to create this ticker, we’ll start with hardware and then detailed instructions of the software
| Item | Hardware | Cost ($USD) | Source |
|---|---|---|---|
| 1 | Raspberry Pi Zero W | $10 | https://www.adafruit.com/category/933 (also available on Amazon) |
| 1 | ScrollPhat HD | $14 | https://shop.pimoroni.com/products/scroll-phat-hd (Also on Amazon) |
| 1 | MicroSD Card 8GB+ | $7 | https://www.amazon.com/Sandisk-MicroSDHC-Memory-Card-Adapter/dp/B000WH6H1M |
| 1 | Raspberry Pi Case | $8 | (optional) Official Case with interchangeable lids |
| Total | Approx: | $39 | approximate cost individual tems |
| Pi ZeroW Kit | Cost | $32 | Complete Raspberry Pi Zero Kit from Cana Kit (note: does not include the scrollPhat HD) |
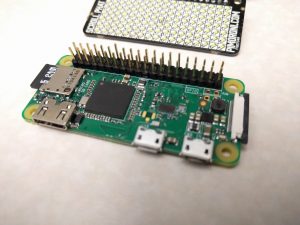
You’ll also need a little patience and the ability to solder the pins onto the Raspberry Pi and the scrolllPhat HD, this is not as bad as it seems, Soldering the 40-pin connector isn’t too bad and there are many learning videos on youtube on how to solder. When your’re done , check all the solder joints , make sure you don’t have ay solder bridges and all the joints formed a food connection good, don’t worry if you don’t get it right the first time (this happened to me the first time) , its easy to fix, just either add a little solder or make sure no solder bridges exist.
Software Required
Once all the hardware is setup you can move onto the software here are the steps and software that you will need.
- Raspbian: This is the default Debian based Linux operating system for the Raspberry Pi, there are others, but you’ll find the most support especially when attaching hardware . Download the full edition of Raspbian “Stretch” https://www.raspberrypi.org/downloads/raspbian/(or whatever is the latest version, currently its Stretch) . You have two options full or lite edition, I recommend full to make sure you get any ancillary libraries or tools you need.
- Etcher.io: This is a SD card burning software that you’ll need to take the downloaded Raspbian Image and put it on your card. It’s very straightforward, install and run the software choose the zip file downloaded (Raspbian file) , insert the MicroSD card into your computer and press the Flash! button
Once the software is brunt onto the SD card, you can take the microSD insert it into the PI and power it . Now because the Pi has small USB connectors for th USB/mouse and small HDMi connector you may have a hard time connecting it to a monitor without the adapters (which are included in the kit above). There’s a way to get it up and running. If you’re comfortable with Linux shell (SSH) commands, you can configure your newly minted SD card with a few files that allow you to run the RPi in “Headless Mode“, meaning you can control the entire device just by having it log into your wifi. Here’s a nice posting setup instructions on getting your PiZeroW into Headless Mode.
Basically it involves adding a few files to the root of the SD card you just created. First creating a wpa_supplicant.conf in a text editor (as below) updating the information to match your WIFI’s network credentials, and saving it in the root of your SD Card. Then also create an empty file named ssh, in the same root folder. Save all and insert your SD card into your RpiZeroW.
network={
    ssid="SSID"
    psk="password"
    key_mgmt=WPA-PSK
}
With the Raspberry Pi Zero running, testing ScrollPhat HD
Once you have your’re raspberry pi zero up and running, and you confirmed this by logging in via ssh into the pi, next let’s download the supporting libraries for your led ticker hardware, the Scroll Phat HD. You can do this by going to PiMoroni’s official GitHub for ScorllPhat HD page and following these steps. There’s a bunch of ways to install the supporting libraries, you’ll need to do this so the Pi knows about the led hardware.
curl https://get.pimoroni.com/scrollphathd | bash

or

sudo apt-get install pimoroni
Once you have installed the supporting software, the first thing you should do is run a few of their python test scripts to verify that the ScrollPhat you soldered on is working properly.. Simple do this.. from your /home/pi folder (Assuming you installed it here), just run one of the many examples. Here I’ll run the simple clock script, and if your ScrollPhat HD lights up your good to go.
python /home/pi/Pimoroni/scrollphathd/examples/clock.py
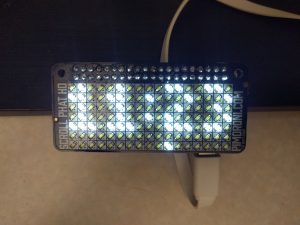 If you get an error message then, either you are missing a library, or there’s a hardware sure with the connection re-check your solder joints.
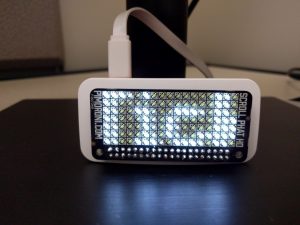
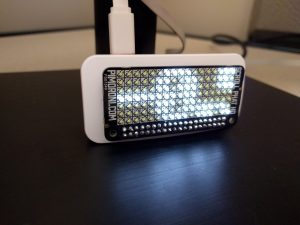
Once you see something like this you’re all good, all that’s left to do is grab my stock ticker code below (or get if from my Github StockTicker page )
Installing and running the StockTicker.py
The stock ticker code below basically does the following:
- At the top of the Python script you define a list of stock symbols and corresponding alert percentages for each symbol
- Choose the display mode continuous or alerting (non-continuous)
- Adjust polling , ie. refresh intervals when to get stock prices.
- then the script web scrapes (I know don’t yell at me, Ill provide alternatives), near real-tme stock and displays them on the ticker.
The python script is pretty straightforward, and borrows heavily from the /examples/advanced- scrolling.py script to provide for smooth line scrolling.
Basically the stockticker, web scrapes Google Finance for the stock prices, then displays the returned data on the ScorllPhat HD Led screen.
Here’s breakdown of some of the core code components.
Near the to of the script you define what stocks you want to track and what the alerting thresholds are.
#how long to wait secs.  before refreshing data and blanking screen
REFRESH_INTERVAL = 180 #defult every  three  minutes


#Ticker mode:
# True: a scrolling ticker refrreshing all stocks continuously
# False: on specific alert price/percent change  displays stock price - silent otherwise
continuous_ticker=False # set to False to use Alert style


#Stock symbols Change stock symbols to match your favorites
# format is {SYMBOL: % change to trigger}
#percent represents trigger % (1.50=1.5%)  PERCENT change value stock to appear when continuous_ticker=False
#if  sotck price exceeds by -% / +%   it will be displayed
stock_tickers = { "F": 1.00, "T": 1.50,"GE": 1.50,"BP": 2.0,"TEVA": 1.50,"ROKU": 2.0,"GRMN": 3.0,"GLD": 0.60 }
Also there’s an option to have the ticker be:
- continuous_ticker = true : means just get all all the stocks and prices and continuously tick them like a traditional stock tickers
- continuous_ticker = false: means just add those stocks who’s percentage has gone above/below the threshold trigger % value next to them (ie. “T”: 1.50, means if AT&T goes above/below 1.5% add it to the ticker, otherwise nothing happens) , this is so your attention is only captured when there is movement to a stock you want to know about.
Some other interesting sections of code include the web -scraping function which goes to to Google Finance and web scrapes the results. I know, I now web scraping is so 1990’s but its a friction less way to get the data , without the hassle of having to sign up for api keys, but with the understanding that it can break at any moment, should the format change.
def stockquote(symbols=None):
  global json_data
  stock_table=''

  symbol_list= symbols.split(",")

  if not symbols:
    return  json.loads('{"Stocks":["none"]}')

  # Stock web scraping code,  I know this is not the best way ... its quick and dirty :)
  # this can be revised to use an API-key based stock price tool
  #  Consider rewriting this section using  https://pypi.python.org/pypi/googlefinance
  # or using pandas-datareader https://github.com/pydata/pandas-datareader
  # right now we just scrape google page

  try:
    base_url ="https://finance.google.com/finance?q="+symbols

    print "fetching... "+base_url
    headers = { 'User-Agent' : 'Mozilla/5.0' }
    req = urllib2.Request(base_url, None, headers)
    html = urllib2.urlopen(req).read()

    #first use reg ex to extract the JSON snippet all the stock quotes we need
    stock_table = re.search('"rows":(.*?)]}]', html)

    json_string = stock_table.string[stock_table.start():stock_table.end()]  # extract the json
    json_string= "{"+ json_string + "}"
    json_data = json.loads(json_string)  #convert into a json data object
    #print json_data
  except Exception as e: print(e)


  return json_data
As for the Web scraping, I understand this is not the ideal way to grab the stock prices, but its really flexible and you only need a few lines of code, but you can easily modify the code and use something a little more defined , like an API or Pandas-datareader. or sign up for free stock quote service via API keys from services like AlphaVantage (API here)
Once we have the stock prices load up them along with some system status info (like IP Address) and time in one function load_data(). The lines buffer is what is sent to the LED scroll
def  load_data():
  global display_once, lines

  # empty lcd buffer
  lines[:] = []

  #one time display
  if display_once==True:
    print  "Gettig Ticker DATA ..."
    lines.append(TICKER_TITLE )
    ip_address=get_ip_address("wlan0")
    print "IP: "+ip_address
    lines.append("IP: "+ip_address )
    display_once=False  #now no longer display

  #get Stock quotes
  lines.append( get_stock_quotes() )

  #Every hour on the hour   blink time
  onthehour= datetime.now().strftime('%M')
  if  onthehour=="00" :
     #  Blink on the hours
    for y in range(5):
      blink( datetime.now().strftime('%H%p') )


  now = datetime.now().strftime('%m-%d-%y %H:%M %p')
  lines.append(now )

  print "Time: "+now


  return lines
Finally all the hard work of displaying the scrolling data (lines) is done via the start_led() function, which is a rip-off of the advanced scrolling example that comes with the ScrollPhat HD.
def startled():
  global scrollphathd, lines ,lengths,line_height

  #  Clear buffer
  scrollphathd.clear()  # so we can rebuild it
  scrollphathd.show()

  if is_connected() == False:
    print "No Internet connection available. No data to display" #getip addressss
    lines.append("IP: "+get_ip_address("wlan0") )
    lines.append("NO Internet Connection.")
    scrollLine(lines)
  else:
    print "Initial data load"
    load_data()


  #code below directly from Pimoroni Advanced-scrolling example
  # Determine how far apart each line should be spaced vertically
  	line_height = scrollphathd.DISPLAY_HEIGHT + 2

  # Store the left offset for each subsequent line (starts at the end of the last line)
  offset_left = 0

  # Draw each line in lines to the Scroll pHAT HD buffer
  # scrollphathd.write_string returns the length of the written string in pixels
  # we can use this length to calculate the offset of the next line
  # and will also use it later for the scrolling effect.
  lengths = [0] * len(lines)

  print "Content of lines buffer: "+str(len(lines))
  print lines


  for line, text in enumerate(lines):
    lengths[line] = scrollphathd.write_string(text, x=offset_left, y=line_height * line)
    offset_left += lengths[line]

    print "Adding to buffer: "+text
    # This adds a little bit of horizontal/vertical padding into the buffer at
    # the very bottom right of the last line to keep things wrapping nicely.
    scrollphathd.set_pixel(offset_left - 1, (len(lines) * line_height) - 1, 0)


  return; #end of start_lcd
Complete file is located here in my github repo.
Conclusion
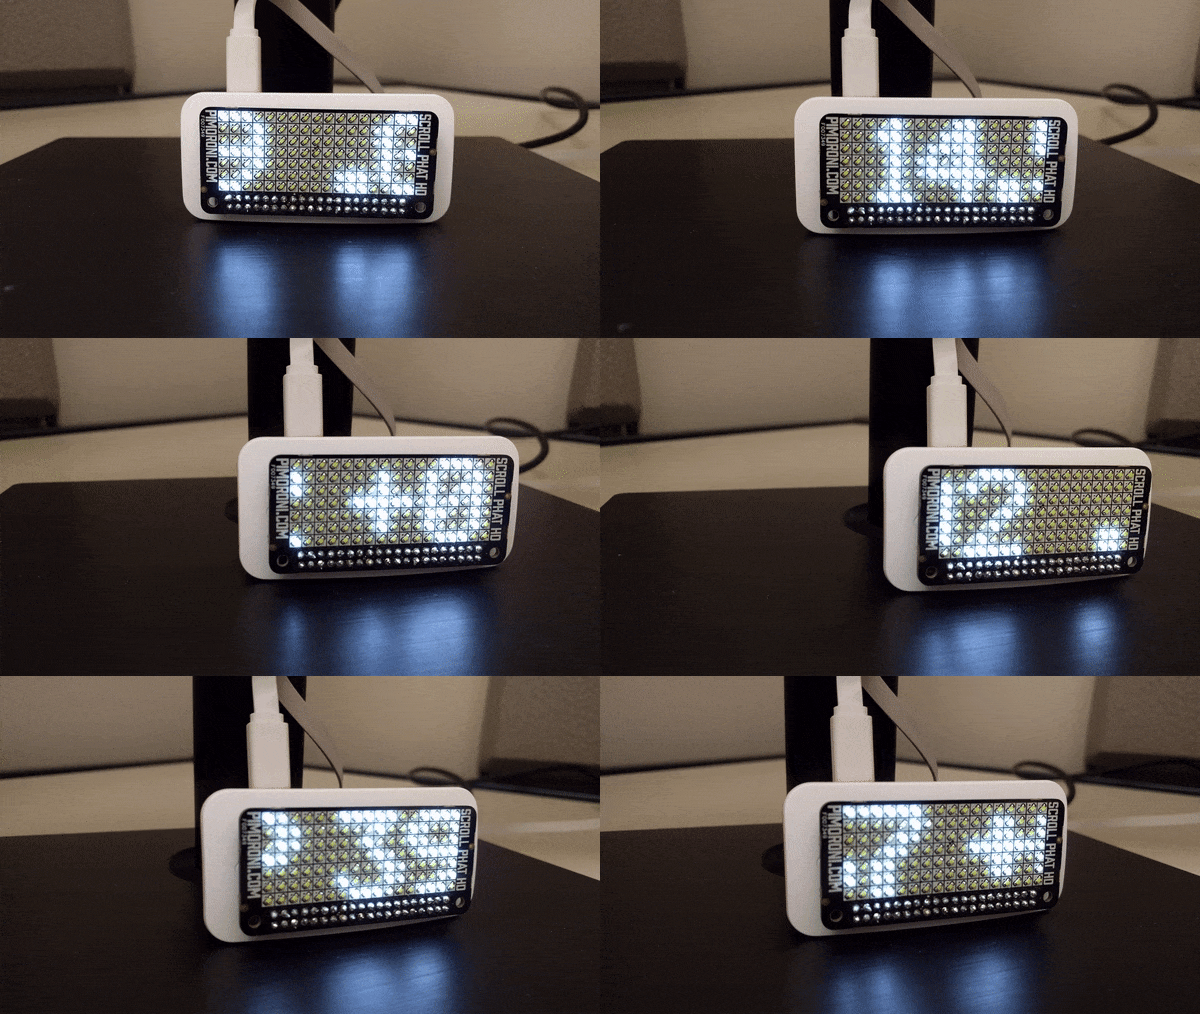
I know, I know, what you’re thinking, but Tony, I have stocks on my mobile and can get alerts there, of course you can, but this is about having something on your physical desktop , right at eye-level and offer immediate , timely updates to stocks you want to follow.. and just having it notify you in an unobtrusive way, and also about making a Raspberry Pi project and having some fun! Enjoy,
I also have a headline news , stocks and weather script here,which does similar things with weather and headlines
Can you customize this to show sports scores?
yes, check my github theres one for news and weather than can be easily modified
Your script does not work, with the scraping part, it appears that Google Blocks this form of scraping if done multiple times.. any idea where else to get stock prices.
It appears Google meters number of requests from specific ip/locations, will look into other sources.